Manual awning parts are essential components for non-motorized awning systems, offering durability and functionality. Key elements include frames, fabrics, mounting brackets, and hardware, ensuring stability and weather resistance.
Types of Awnings
Awnings come in manual, electric, and hybrid models, each offering distinct mechanisms and functionalities. Manual awnings are crank-operated, while electric ones use motors for effortless extension and retraction.
Manual Awnings
Manual awnings are a popular choice for their simplicity and reliability. They operate using a crank handle, allowing users to extend or retract the fabric as needed. The frame is typically made of durable materials like aluminum, while the fabric is weather-resistant and available in various styles. Manual awnings are cost-effective, require minimal maintenance, and provide precise control over shading. They are ideal for those who prefer a straightforward, non-motorized solution for outdoor shade.
Electric Awnings
Electric awnings are motorized, offering effortless operation with the touch of a button or remote control. They are ideal for larger spaces and feature automatic sensors to adjust to wind and sunlight. These awnings are durable, with weather-resistant fabrics and sturdy frames. While they require electrical installation, they provide convenience and energy efficiency. Electric awnings are perfect for homeowners seeking a modern, low-maintenance shading solution, combining style with advanced functionality.
Hybrid Awnings
Hybrid awnings combine the best of manual and electric features, offering flexibility and convenience. They can be operated manually or switched to electric mode, depending on user preference. This dual functionality makes them ideal for varying weather conditions and energy efficiency. Hybrid awnings are durable, low-maintenance, and suitable for patios, decks, or RVs, providing versatile shading solutions for any setting. Their adaptability ensures reliable performance, catering to different needs and preferences.
Dometic Awning Parts
Dometic awning parts are renowned for their durability and reliability, offering a wide range of components designed for manual and electric awnings. They ensure optimal performance and longevity.
Dometic Parts Diagram
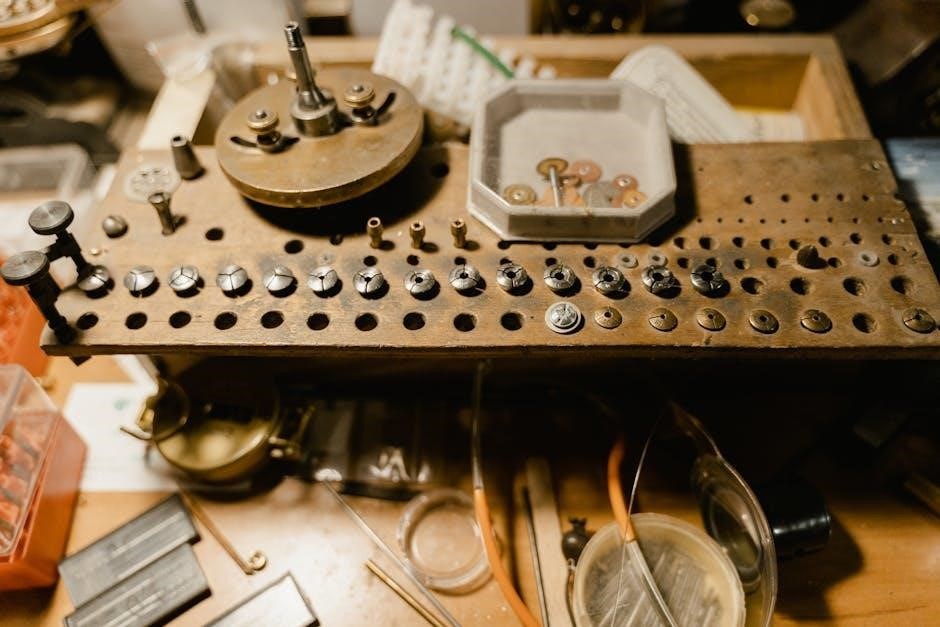
A Dometic parts diagram is a detailed visual guide illustrating the components of your awning. It helps identify and locate parts, ensuring accurate repairs and maintenance. Available online or in owner’s manuals, these diagrams simplify troubleshooting by providing a clear overview of the awning’s structure. Use the diagram to pinpoint specific parts, such as arms, brackets, or fabric, and ensure proper installation or replacement. It’s an essential tool for maintaining your Dometic awning’s optimal performance and longevity.
Dometic 8500 Parts List
The Dometic 8500 parts list includes essential components like the main arm, roller tube, fabric, and mounting hardware. It also covers accessories such as weather shields and privacy panels. This list is crucial for maintenance and repairs, ensuring you can identify and order the correct parts. The 8500 series is known for its durability, but proper upkeep requires knowing its components. Refer to the owner’s manual or online resources for a detailed, categorized breakdown of the parts, organized for easy reference and replacement.
Dometic Awning Repair
Common repairs for Dometic awnings involve fixing fabric tears, motor issues, and worn arms or hinges. Use official guides and genuine parts for DIY fixes. Regular maintenance, like lubricating moving parts and cleaning, helps prevent major repairs. Refer to your manual for instructions. For complex problems, contact Dometic support or authorized centers to ensure proper repair and maintain warranty.
Carefree Awning Parts
Carefree awning parts include durable hardware, fabrics, and accessories designed for manual operation. They ensure reliable performance and are ideal for outdoor shading solutions on RVs and homes.
Carefree Parts Diagram
A Carefree parts diagram provides a detailed visual guide to understanding the components of your manual awning. It illustrates the assembly, including arms, brackets, springs, and fabric attachments. The diagram helps identify specific parts, such as the manual crank, awning rail, and mounting hardware. This resource is essential for troubleshooting, maintenance, and replacing worn or damaged components. By referencing the diagram, users can ensure proper installation and operation of their Carefree manual awning system.
Carefree Parts List
A Carefree parts list includes essential components for manual awning functionality. Key items are the manual crank handle, awning arms, mounting brackets, spring tension adjuster, fabric or vinyl, roller tube, and end caps. Additional components may include snap studs, awning rails, and locking knobs. This list ensures users can identify and replace worn or damaged parts efficiently, maintaining optimal performance and longevity of their Carefree manual awning system.
Carefree Awning Repair
Carefree awning repair involves addressing common issues like torn fabric, misaligned arms, or faulty mechanisms. Start by inspecting the awning for damage and cleaning debris. Lubricate moving parts to ensure smooth operation. For fabric tears, use repair kits or replace the fabric entirely. If arms are misaligned, adjust the springs or replace worn bushings. Tighten loose screws or bolts to secure the frame. Regular maintenance and timely repairs extend the lifespan of your Carefree manual awning, ensuring reliable performance.
Lippert Awning Parts
Lippert awning parts include durable hardware, arms, and brackets designed for manual and electric models. They offer high-quality components for reliable shade solutions and easy installation.
Lippert Parts Diagram
A Lippert parts diagram provides a detailed visual representation of awning components, including arms, brackets, and springs. It labels each part clearly, helping users identify and locate items easily. The diagram is essential for manual awning installation, repair, and maintenance, ensuring proper assembly and functionality. It also highlights how components interact, making troubleshooting simpler. Referencing the diagram helps owners understand their awning’s structure and ensures accurate part replacement. Always consult the official Lippert manual or manufacturer’s website for the most accurate and updated diagrams.
Lippert Parts List
A Lippert parts list outlines essential components for manual awnings, including arms, mounting brackets, springs, and fabric. It specifies part numbers and descriptions, aiding in identification and ordering. The list may include hardware like bolts, screws, and pivot pins; It also covers optional accessories such as awning locks or extension arms. This comprehensive catalog ensures users can maintain or repair their awnings efficiently. Always verify compatibility with your specific Lippert model for accurate part selection and installation.
Lippert Awning Repair
Repairing a Lippert manual awning involves diagnosing issues like damaged fabric, faulty arms, or worn-out hardware. Start by inspecting the awning for tears or bent parts. For fabric damage, patching kits can be effective. If arms are malfunctioning, check for loose connections or damaged springs. Lubricate moving parts to ensure smooth operation. Always refer to the Lippert parts list for compatible replacements. Proper installation and regular maintenance can prevent future issues and extend the awning’s lifespan.
Understanding Awning Diagrams
Awning diagrams are essential tools for identifying and understanding the components of manual awnings. These visual guides illustrate the structure, including the fabric, arms, brackets, and hardware. By referencing a diagram, users can locate specific parts, such as springs, hinges, androllers, and understand how they interact. This is particularly useful for troubleshooting or replacing damaged elements. Diagrams also help in assembling or disassembling awnings correctly, ensuring proper functionality and safety. Always refer to the manufacturer’s diagram for accurate information tailored to your awning model.

RV Awning Parts List
RV awning parts include arms, brackets, fabric, springs, hinges, and hardware. These components ensure proper functionality and durability for manual operation.
Standard Parts
Manual awnings typically include arms, brackets, fabric, springs, and hardware. The arms are durable metal pieces that extend and retract, while brackets secure the awning to the RV. Fabric provides shade, and springs assist in manual operation. Additional hardware, such as bolts and screws, ensures stability. These standard parts are essential for proper functionality and longevity, making them critical components for RV awning systems.
Slideout Awning Parts
Slideout awnings include specialized components like roller tubes and support brackets designed for lateral extension. These parts accommodate the unique movement of RV slideouts. The awning fabric is typically reinforced for durability, and adjustable tensioning systems ensure proper alignment. Additional hardware, such as bolts and straps, secures the awning to the slideout. Optional features like lateral supports and drip rails enhance functionality and protection, making slideout awnings a practical choice for RV owners.
Door Awning Parts
Door awning parts are designed for smaller-scale protection, typically above RV doors. Key components include a sturdy frame, usually made of aluminum, and durable waterproof fabric. The system includes mounting brackets for secure attachment to the door frame. Additional features like drip edges and wind deflectors enhance water runoff and stability. Manual operation relies on pull straps or hand cranks for easy setup. These parts are compact yet robust, ensuring reliable performance for door protection.
Installation and Maintenance
Installation involves aligning and securing brackets and arms. Maintenance requires regular cleaning, inspecting fabric, and lubricating moving parts to ensure longevity and smooth operation always.
Hardware Parts
Essential hardware parts for manual awnings include mounting brackets, bolts, screws, springs, and adjustment knobs. These components ensure secure installation and smooth operation. Brackets attach the awning to the RV, while springs and knobs control tension and alignment. Durable materials like stainless steel or aluminum are often used to withstand outdoor conditions. Proper selection and installation of these parts are crucial for stability and longevity. Always refer to the manufacturer’s specifications for compatibility and safety. Regular inspection is recommended to prevent wear and tear.
Assembly Instructions
Assembling a manual awning involves several key steps. Begin by unpacking all components and organizing them according to the parts list. Attach the mounting brackets to the RV using the provided hardware, ensuring they are securely fastened. Next, connect the awning frame to the brackets, aligning it properly. Tighten all bolts and screws firmly. Finally, test the awning by manually extending and retracting it to ensure smooth operation. Always consult the manufacturer’s manual for specific assembly details and use the correct tools to avoid damage. Proper assembly ensures safety and functionality. Regular checks are essential for longevity.
Troubleshooting Common Issues
Identifying and addressing problems with manual awnings is crucial for optimal performance. Common issues include difficulty retracting, jammed gears, or damaged fabric. Inspect the awning for obstructions or misaligned parts. Lubricate moving components if they feel stiff. For fabric tears, apply a patch kit or seek professional repair. Ensure all springs and hinges are tightly secured. If the awning won’t extend, check the crank mechanism for wear or damage. Regular maintenance can prevent many of these issues, ensuring reliable operation and extending the awning’s lifespan.
How to Use a Manual Awning
Using a manual awning involves extending the frame, attaching the fabric, and securing it with poles or straps. Always follow the manufacturer’s instructions for setup and retraction to ensure safety and proper function;
Setting Up
Setting up a manual awning begins with extending the awning frame from its stored position. Attach the awning fabric securely to the roller tube using the provided straps or clips. Next, position the support poles and insert them into the designated brackets on the RV or building. Tighten the poles firmly to ensure stability. Use awning tie-downs or ground stakes to anchor the structure, ensuring proper tension and alignment. Always check for levelness and tighten all connections to prevent swaying or damage.
Retracting
Retracting a manual awning involves carefully winding the fabric back onto the roller tube. Begin by loosening the tension knobs on the awning arms, allowing the fabric to slacken slightly. Next, manually crank the handle clockwise to roll the fabric tightly onto the tube. Ensure the fabric is evenly aligned to prevent creases or damage. Once fully retracted, secure the arms with the retaining clips or straps. Always inspect the awning for proper alignment and tighten any loose connections before storage.
Manual Awning Accessories
Essential accessories include mounting brackets, fabric replacement kits, weather shields, and tie-downs, enhancing durability and stability for optimal shade and weather protection.
Mounting Brackets
Mounting brackets are crucial for securing manual awnings to RVs or buildings. Made from durable materials like steel or aluminum, they ensure stability and proper alignment. Adjustable brackets offer flexibility, accommodating different roof heights and angles. Secure installation prevents sway and damage from wind. Brackets come in various styles, such as side-mount or roof-mount, to fit specific setups. Properly installed brackets enhance the awning’s performance and longevity, providing reliable shade and weather protection. They are a key component for safe and functional awning operation.
Fabric Replacement
Fabric replacement is essential for maintaining the functionality and appearance of manual awnings; Over time, awning fabrics can fade, tear, or become worn due to weather exposure. Replacement fabrics are available in various materials, such as waterproof vinyl or UV-resistant canvas, to suit different needs. The process involves removing the old fabric, inspecting the frame, and securely attaching the new material. Proper installation ensures tight fitting and optimal shade performance. Regular fabric replacement extends the awning’s lifespan and enhances its durability.
Safety Tips
When working with manual awning parts, prioritize safety to avoid accidents. Always inspect the awning for damage before use, ensuring all hardware is secure. Avoid operating the awning in strong winds or heavy rain, as this can cause structural stress. Use proper tools and techniques when handling parts to prevent injury. Never leave the awning unattended while extended, especially near children or pets. Regular maintenance and inspections can help identify potential hazards early, ensuring safe and reliable performance.
FAQs
- How long do manual awnings typically last? With proper care, manual awnings can last 10-15 years, depending on fabric quality and usage.
- Can I repair manual awning parts myself? Minor repairs like fabric patches or lubricating hinges can be done DIY, but complex issues may require professional help.
- How often should I inspect my awning? Regular inspections every 3-6 months are recommended to ensure all parts are in good condition.
- Are manual awnings easy to install? Yes, but larger models may require assistance to ensure proper alignment and stability.
- What’s the best way to clean awning fabric? Use mild soap and water, avoiding harsh chemicals that might damage the material.
Advantages of Manual Awnings
- Cost-Effective: Manual awnings are generally more affordable than electric models, making them a budget-friendly option.
- Reliability: With fewer mechanical components, manual awnings are less prone to malfunctions and require less maintenance.
- Portability: They are often lighter and easier to transport, ideal for campers or temporary setups.
- Easy Repair: Replacing or fixing parts is simpler due to their straightforward design.
- Energy Efficiency: No electricity is needed, making them eco-friendly and perfect for off-grid use.

Comparison: Manual vs. Electric Awnings
Manual awnings offer simplicity and cost-effectiveness, ideal for those who prefer minimal maintenance. Electric awnings provide convenience with motorized operation, suitable for larger setups. Manual awnings are lighter and easier to install, while electric ones require more hardware and power. Manual models are better for temporary use, whereas electric awnings are perfect for permanent installations. Both options cater to different needs, with manual being budget-friendly and electric offering ease of use.
Choosing the Right Manual Awning Parts
Selecting the right manual awning parts involves measuring your awning frame to ensure proper fit. Identify the specific components needed, such as brackets, handles, or fabric. Consider the material quality and durability for outdoor conditions. Check compatibility with your awning model and brand. Refer to diagrams or manuals for accurate selection. Optional accessories like weatherproofing kits can enhance performance. Always prioritize parts designed for manual systems to avoid mixing with electric components, ensuring smooth operation and longevity.
Understanding manual awning parts is essential for maintaining and enhancing your outdoor shade solutions. By knowing the components and their functions, you can ensure proper installation, repair, and customization. Regular maintenance and timely replacements extend the lifespan of your awning. Always refer to diagrams or manuals for precise part selection. With the right knowledge and tools, you can enjoy durable, functional, and stylish shade systems for years to come. Happy DIYing and safe outdoor adventures!